My novel writing has come to a grinding halt. I could list several reasons, but as they would sound like excuses, I will refrain from boring you with the details right now. Let’s just say I am sixteen chapters deep (around 35,000 words), and the next step in the plot has managed to elude me. Am I giving up? Oh, hell no! Just a temporary slump.
In the lull, I tasked myself to find out how Amazon’s Kindle Direct Publishing (KDP) works. As I am using this time as a sorbet between novel writing, a palette cleanser if you will, I purposefully chose different genres and shorter writing timelines.
Proof is always in the pudding and two items thus far have been successfully published on Amazon. Theoretically they could be bought should someone stumble upon them, however, this is a highly unlikely event given the current lack of any marketing or sales activities in place. Competition in this space is pretty hectic. I will address the KDP publishing process and the sales and marketing aspects as separate blogs.
The two items currently available are:
- A notebook – In dedication to my beautiful Tucker, who sadly passed away in June. Available as a paperback or hardcover – https://www.amazon.com/dp/B0C9S7QT68.
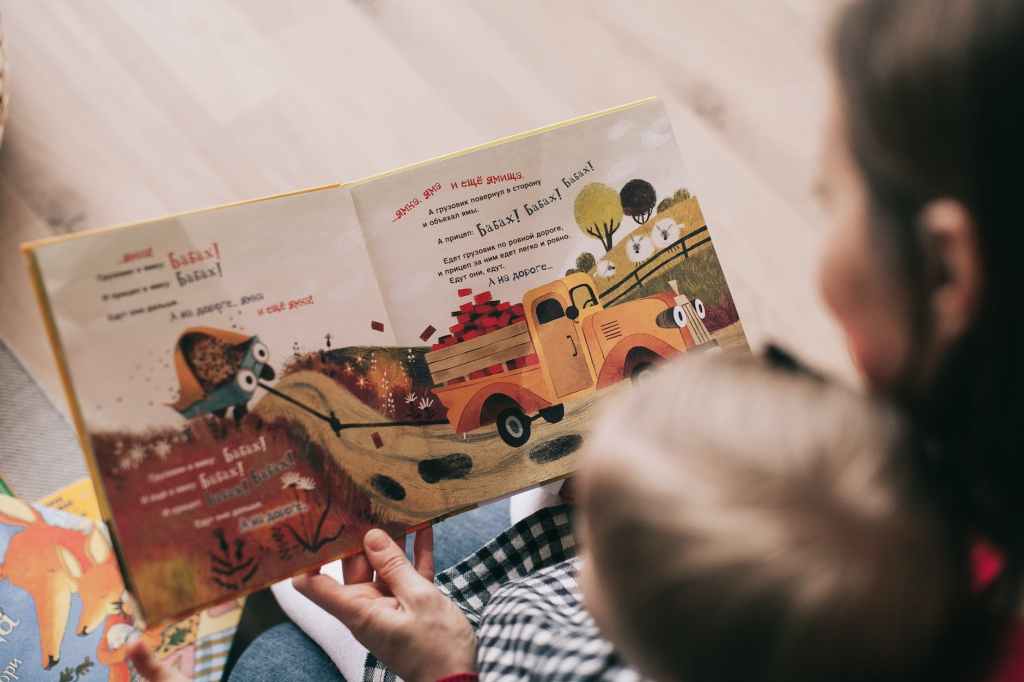
- A children’s short storybook. Available as an e-book or a paperback –https://www.amazon.com/dp/B0C9S88QB6. I must just say that I enjoyed writing this short story very much!
This blog speaks to creating a book on Canva (a reasonably priced, very cool, design tool available on http://www.canva.com) with the intent of publishing on KDP. The below sequence of activities is based on my experience, mistakes and learning when publishing the above works.
PART 1: PAGE SET-UP
Select your Trim (Page) Size
Depending on the type of book, the size of its pages may well differ. For example, a novel would likely be smaller than a colouring book. According to KDP, the typical size for a novel is 6” x 9” (15.24 x 22.86cm).
I chose 7”x 10” for my children’s storybook.
If you’re unsure which size to pick, find books with content like yours and see what size makes sense for your book.
KDP allows you to set up the same book as an eBook, paperback and hardcover, so it’s beneficial to consider what size suits all upfront rather than having to resize for each type later (which of course you can do if needs be). As far as I can tell, eBooks will dynamically resize themselves when uploading your manuscript file.
Another consideration when choosing the size of your book, is the number of pages it may contain as this may influence the size you are allowed. If you decide to create a paperback, it must have a minimum of 24 pages and a maximum of 828 pages for all book sizes up to 8” x 10”. The maximum number of pages drops to 590 for 8.5″ x 8.5” and above. Hardbacks must have a minimum of 75 pages and may contain up to 550 pages.
From a cost consideration, it should be noted that the more pages with more colour and the larger the book size impacts the printing costs you will be charged when your book is ordered.
You can find a nifty little calculator here to see how much the combination of options affects your royalty: https://kdp.amazon.com/en_US/royalty-calculator
Bleed or no Bleed?
Sounds like Halloween, but no reason to stress here.
If your book contains images or graphics (even just one) that run to the edge of the page (and ignores margins), the page size must be larger than the trim size to ensure it prints correctly – This is done to prevent a white border from appearing around the edges.
I used the bleed option as I planned for my children’s book to contain illustrations across pages.
Setting up Your Page
Now that you know the page size you can set it up within your chosen application.
In Canva, create a new project and resize the page according to the trim size you selected, accommodating with/without bleed (My selection is highlighted below).
Margins will automatically be included on the resulting Canva pages.
| Page Size Without bleed | Page size With bleed |
| 5″ x 8″ (12.7 x 20.32 cm) | 5.125″ x 8.25″ (13.01 x 20.96 cm) |
| 5.06″ x 7.81″ (12.85 x19.84 cm) | 5.185″ x 8.06″ (13.17 x 20.47 cm) |
| 5.25″ x 8″ (13.34 x 20.32 cm) | 5.375″ x 8.25″ (13.65 x 20.96 cm) |
| 5.5″ x 8.5″ (13.97 x 21.59 cm) | 5.626″ x 8.75″ (14.29 x 22.23 cm) |
| 6″ x 9″ (15.24 x 22.86 cm) | 6.125″ x 9.25″ (15.56 x 23.50 cm) |
| 6.14″ x 9.21″ (15.6 x 23.39 cm) | 6.265″ x 9.46″ (15.9 x 23.99 cm) |
| 6.69″ x 9.61″ (16.99 x 24.4 cm) | 6.815″ x 9.86″ (17.29 x 25 cm) |
| 7″ x 10″ (17.78 x 25.4 cm) | 7.125″ x 10.25″ (18.08 x 26 cm) |
| 7.44″ x 9.69″ (18.9 x 24.61 cm) | 7.565″ x 9.94″ (19.2 x 25.21 cm) |
| 7.5″ x 9.25″ (19.05 x 23.5 cm) | 7.625″ x 9.5″ (19.35 x 24.1 cm) |
| 8″ x 10″ (20.32 x 25.4 cm) | 8.125″ x 10.25″ (20.52 x 26 cm) |
| 8.5″ x 11″ (21.59 x 27.94 cm) | 8.625″ x 11.25″ (21.89 x 28.54 cm) |
| 8.25″ x 6″ (20.96 x 15.24 cm) | 8.375″ x 6.25″ (21.26 x 15.84 cm) |
| 8.25″ x 8.25″ (20.96 x 20.96 cm) | 8.375″ x 8.5″ (21.26 x 21.56 cm) |
| 8.25″ x 11″ (20.96 x 27.94 cm) | 8.375″ x 11.25″ (21.26 x 28.54 cm) |
| 8.27″ x 11.69″ (21 x 29.7 cm) | 8.395″ x 11.94″ (21.3 x 30.3 cm) |
| 8.5″ x 8.5″ (21.59 x 21.59 cm) | 8.625″ x 8.75″ (21.91 x 22.23 cm) |
PART 2: CREATE YOUR CONTENT
There is nothing much for me to say about this section other than let your creative juices flow. This part is all about you. Your words, your illustrations, your impact!
Do not include your cover page in the content; this is created separately. To assist in getting your bearings though, page 1 of your content is the one you would look at when opening a book. Turning this page over, you would see page 2 to the left, page 3 to the right, and so on.
Your text can stay in the margins provided or be part of your imagery (if you are using bleed), the choice is yours.
Once you are done with your fantastic content, save and check your work. The better the content, the better your book! Look at other books in the same genre to see where to align or improve.
Download finalised content pages to a file on your PC. I downloaded my content from Canva in PDF format, which is acceptable for KDP. Select ‘PDF Print’ and ‘Flatten PDF’ when saving for the best results.
eBook Content Format
Despite KDP allowing .pdf content for hardcover and paperback manuscript upload, this is not acceptable for eBooks. I was disappointed at the time but this turned out to be a blessing in disguise.
You can use other formats for eBooks; however, I chose to pull my content from PDF into ‘Kindle Create’, check it and then export it as a ‘Kindle Create’ file. KDP accepts this manuscript format, and converting the PDF to this format was super easy. More importantly, it allowed me to see that my paperback images were not aligned across pages and needed improvement.
For this reason, If you are creating an eBook and a paperback or hardcover, I suggest you get the content right for your eBook first, particularly if you have illustrations like I did – the Kindle Create App previewer gives you the best view of how images across pages would look.
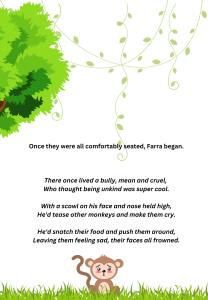
I have exaggerated an example of the problem below so you can visualise what I mean. Imagine you have opened a book and are looking at the left and right-side pages below. Not a great impression, right?
Happy to do a quick blog on this if anyone wants more detail.
PART 3: CREATE YOUR BOOK COVER
Paperback and Hardcover
The cover page is bigger than your normal page as it contains both the front and back covers. It is, therefore created separately to your manuscript content.
I used https://bookow.com/resources.php#kdp-cover-template-generator to get a KDP Cover template to help me get the right size.
When I uploaded my cover to KDP, it was 100% perfect every time so I can vouch Bookow’s accuracy.
All you provide Bookow is the book size (7” x 10” in my case (don’t include extra size for bleed)), the number of pages in your book, if it’s a hardcover or paperback, the ISBN number and an email address for them to send you your template. It arrives in a few seconds.
International Standard Book Numbers (ISBN) : An ISBN, or International Standard Book Number, is a unique number that is assigned to every published book. An ISBN identifies a book’s edition, publisher, and other items like trim size, page count etc. An ISBN allows the book to be searched for. On KDP, you do not need an ISBN to publish an eBook, but you need an ISBN to publish a paperback or hardcover. For paperbacks and hardcover books, KDP can provide you with a free ISBN but just know that if you go this route you will not be able to sell your book anywhere else.
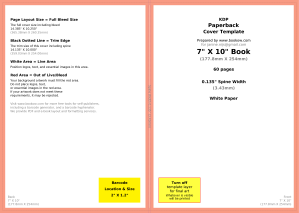
Below is the template I used to create the paperback children’s book cover.
In Canva, set your page to the size indicated on the top right of your specific template. Import the template onto the page (copy paste also works) and then use the guidelines for where to position your artwork etc.
Canva allows you to change the transparency of graphics. Super helpful here as it enables you to make the template transparent enough to see the artwork underneath and get their positioning precisely in the right place.
Once you are done, save and check your content and store it safely for later upload into KDP as a PDF. Make sure the Bookow template cannot be seen!
Select ‘PDF Print’ and ‘Flatten PDF’ when downloading for the best results. According to KDP, files should be less than 40 MB, as larger options slow down printing.
eBook
Your eBook cover needs to be a PNG or TIFF file and is for the front cover of your book only. If you want anything from what would have been on the back cover, you need to include it in your manuscript content.
I created a page the same size as my manuscript page, added the graphics from the paperback front cover and then downloaded it as a PNG file for later import into KDP.
You now have all your elements and are ready to publish on KDP which will be covered in a future blog.
Chat Soon
Janine (J9) Nijs
